Roxtus.cos
22 | Cosplayer | Gamer
Cosplay is life. Come say hi if you see me at a Convention!
FAQ
Can I hang with you at a con?
Yes, absolutely, I like people! :)
Can I take Pictures with you at Conventions
Of course, Just Ask, I love taking photos! I don't bite :)
Can I Hug You?
I love hugs and you are welcome to give them, unless I specify otherwise! :)
How did you get started cosplaying?
In high school I met my con buddies and I got into costume making for halloween and it took off from there.
Do you make your own Cosplays?
Yes, I make pretty much all of my cosplay components! Props, clothing, weapons, you name it!
Where do you get your wigs?
I get most wigs from Amazon and Area Wigs. I style all my wigs myself.
What is your favorite convention?
I really like San Japan and Ikkicon! I hope to go to Sakuracon in April though! That may become one of my favorites!
What are dream cons that you want to attend?
I would really like to go to Katsucon, San Diego Comic Con and Holiday Matsuri.
Do you ship?
Absolutely yes!! I am very into Yaoi!
Favorite Color?
Black, Red, Blue, Green
Hobbies?
Cosplay, Video Games, Reading
Cosplay
-Kassandra...Assassin's Creed Odyssey
-Robin (Damian Wayne)...Batfam
-Rose Wilson(Ravager)...DC
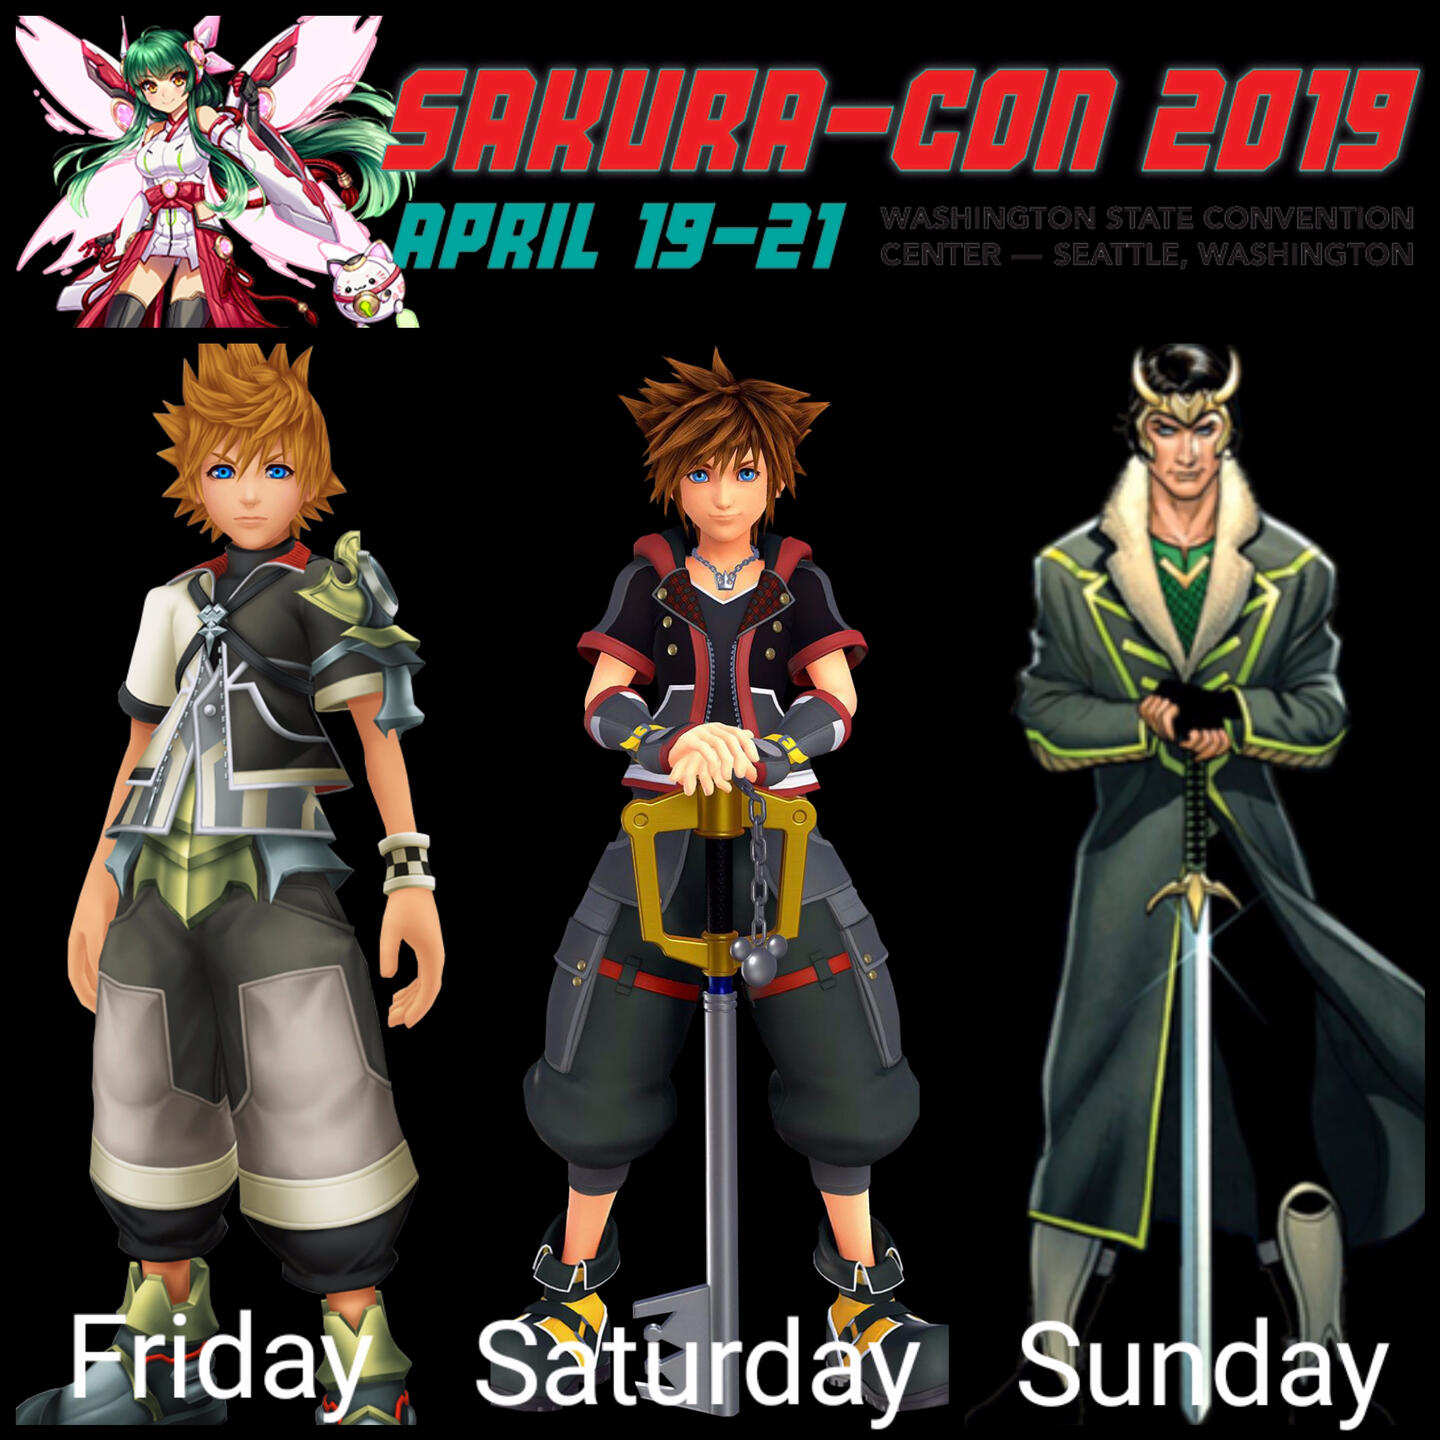
-Sora...Kingdom Hearts 3 -Completed
-Ventus...Kingdom Hearts Birth by Sleep -Completed
-Roxas...Kingdom Hearts
-Aizawa Shouta...My Hero Academia
-Nana Shimura...My Hero Academia
-Arya Stark...Game of Thrones
-Mikaela Hyakuya...Seraph of the End
-P.T. Barnum...Greatest Showman -Completed
-Dark Pit...Kid Icarus
-Korra...Legend of Korra
-Midoriya Izuku (Hero Suit)...My Hero Academia
-Himiko Toga...My Hero Academia
-Drogon Armor...Game of Thrones
-Noctis...FFXV
-Bakugou...My Hero Academia -Completed
-Loki...Agent of Asgard
Conventions
-Sakuracon...April 19-21
-RTX... July 5-7
-Ikkicon
-San Japan...August 30-September 1
-Wizard World Austin...November 8-10
Tutorials


Click on Picture to view Tutorial
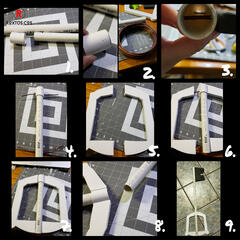
Ditching Tutorial
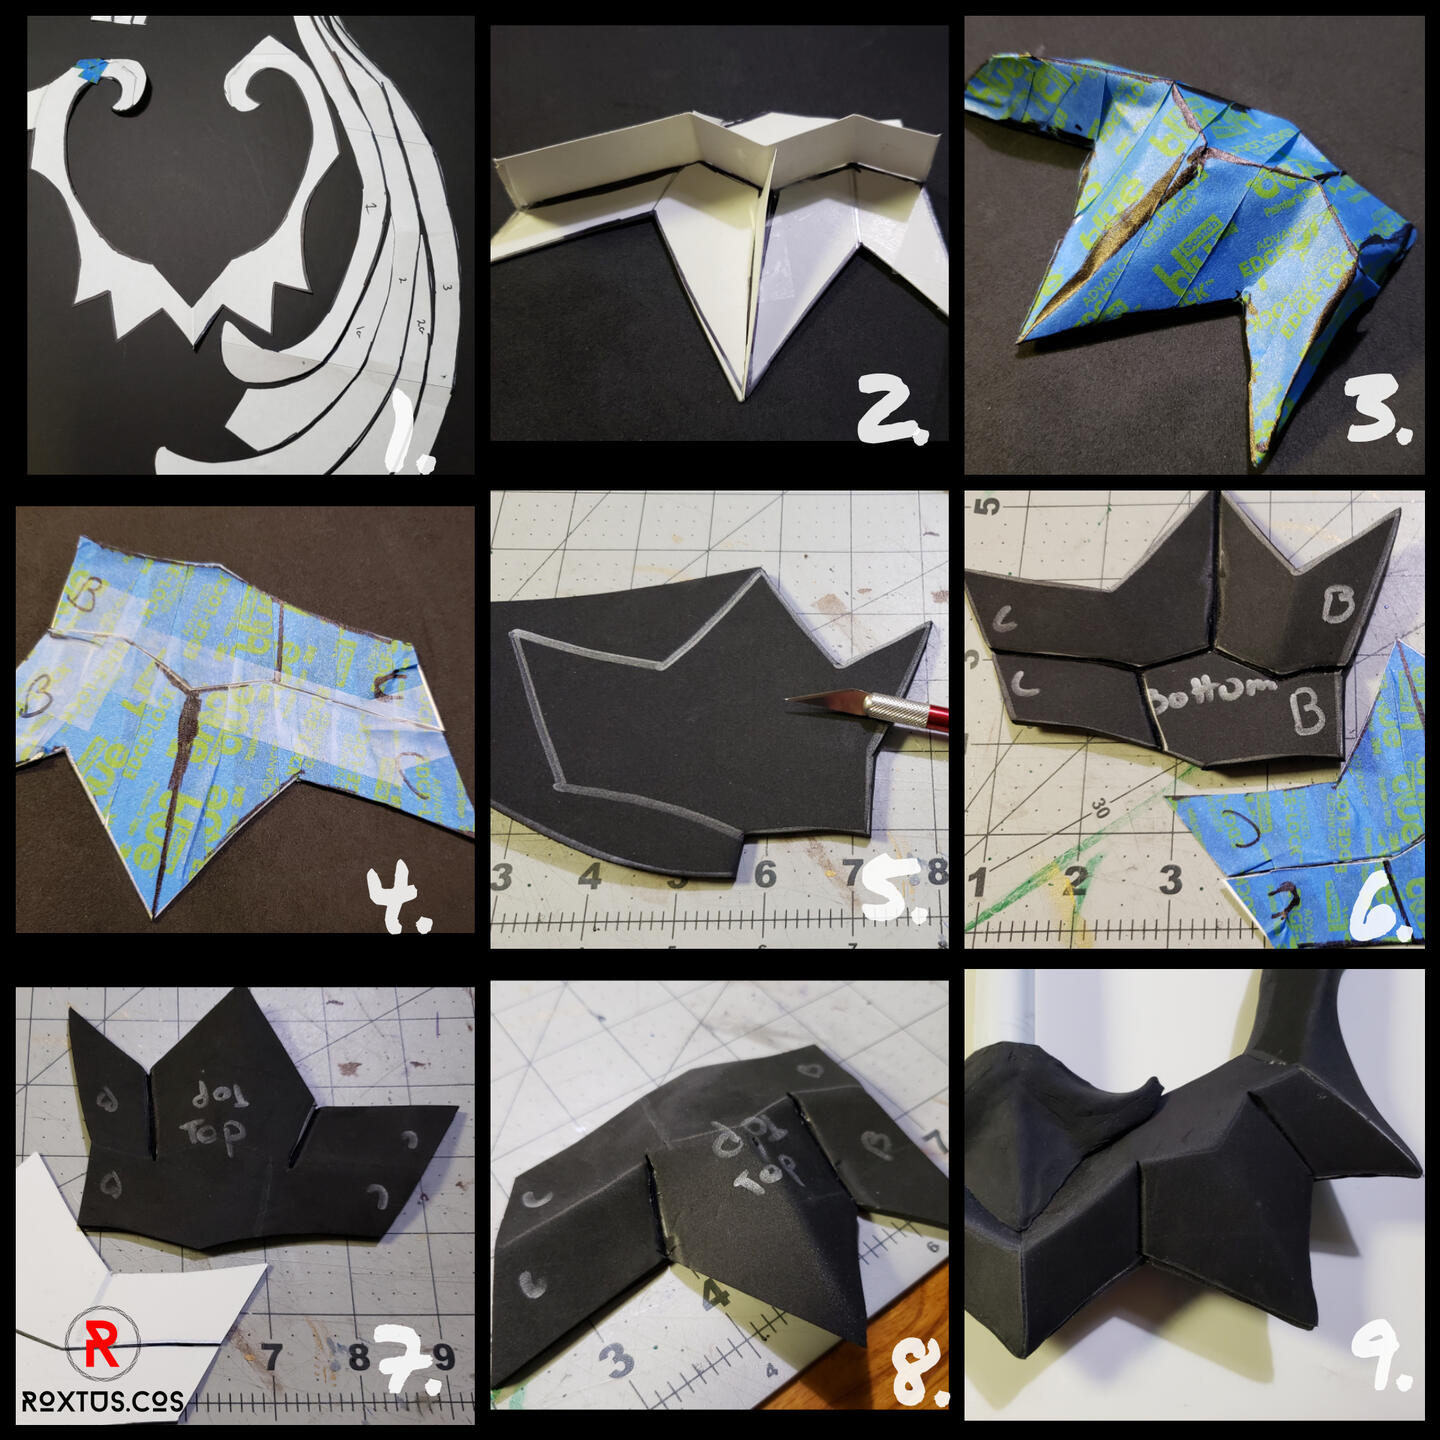
This technique can be used for all the shapes in this design.
1. The first step before making anything, I always draw out the design that I want, so I get the dimensions correct. I then transferred the different parts of the keyblade pattern to another sheet of paper and then to poster board for a thicker backing.
2. Cut out the shapes from poster board then take a strip of poster board and tape it to the middle of the shape where the raised parts are supposed to be.
3. After the middle strips are in place, tape over the shape with masking or painter's tape to create a 3d shape.
4. Then remove the tape form and cut it so that it lays flat. Then place on poster board and cut out the shape.
5. Then place on foam and cut out with an x-acto knife.
6.-7. After the piece is cut out of the foam, you need to ditch the sections where you need to see a raise. I used a woodburning tool the ditch out the middle. Ditching is basically making a gap on one side of the foam without cutting all the way through the foam. (After you ditch, if you fold on the seam when it is still hot, then it should hold its shape when it cools down)
8. Once you're done ditching and folding the sections you should end up with a 3D looking half of a shape. You will need to create 2 pieces that mirror each other to create the final 3D shape.
9. After you have all the shapes you want, you will need to use contact cement to secure them all together. I also used cosplay clay to fill in any gaps that may have appeared after securing the pieces together.
**Feel free to DM me if you have questions!😊 Materials used
@cosplaycrafts 4mm foam and cosplay clayXacto knivesWood burning toolPoster BoardMasking Tape
3D Shapes Tutorial
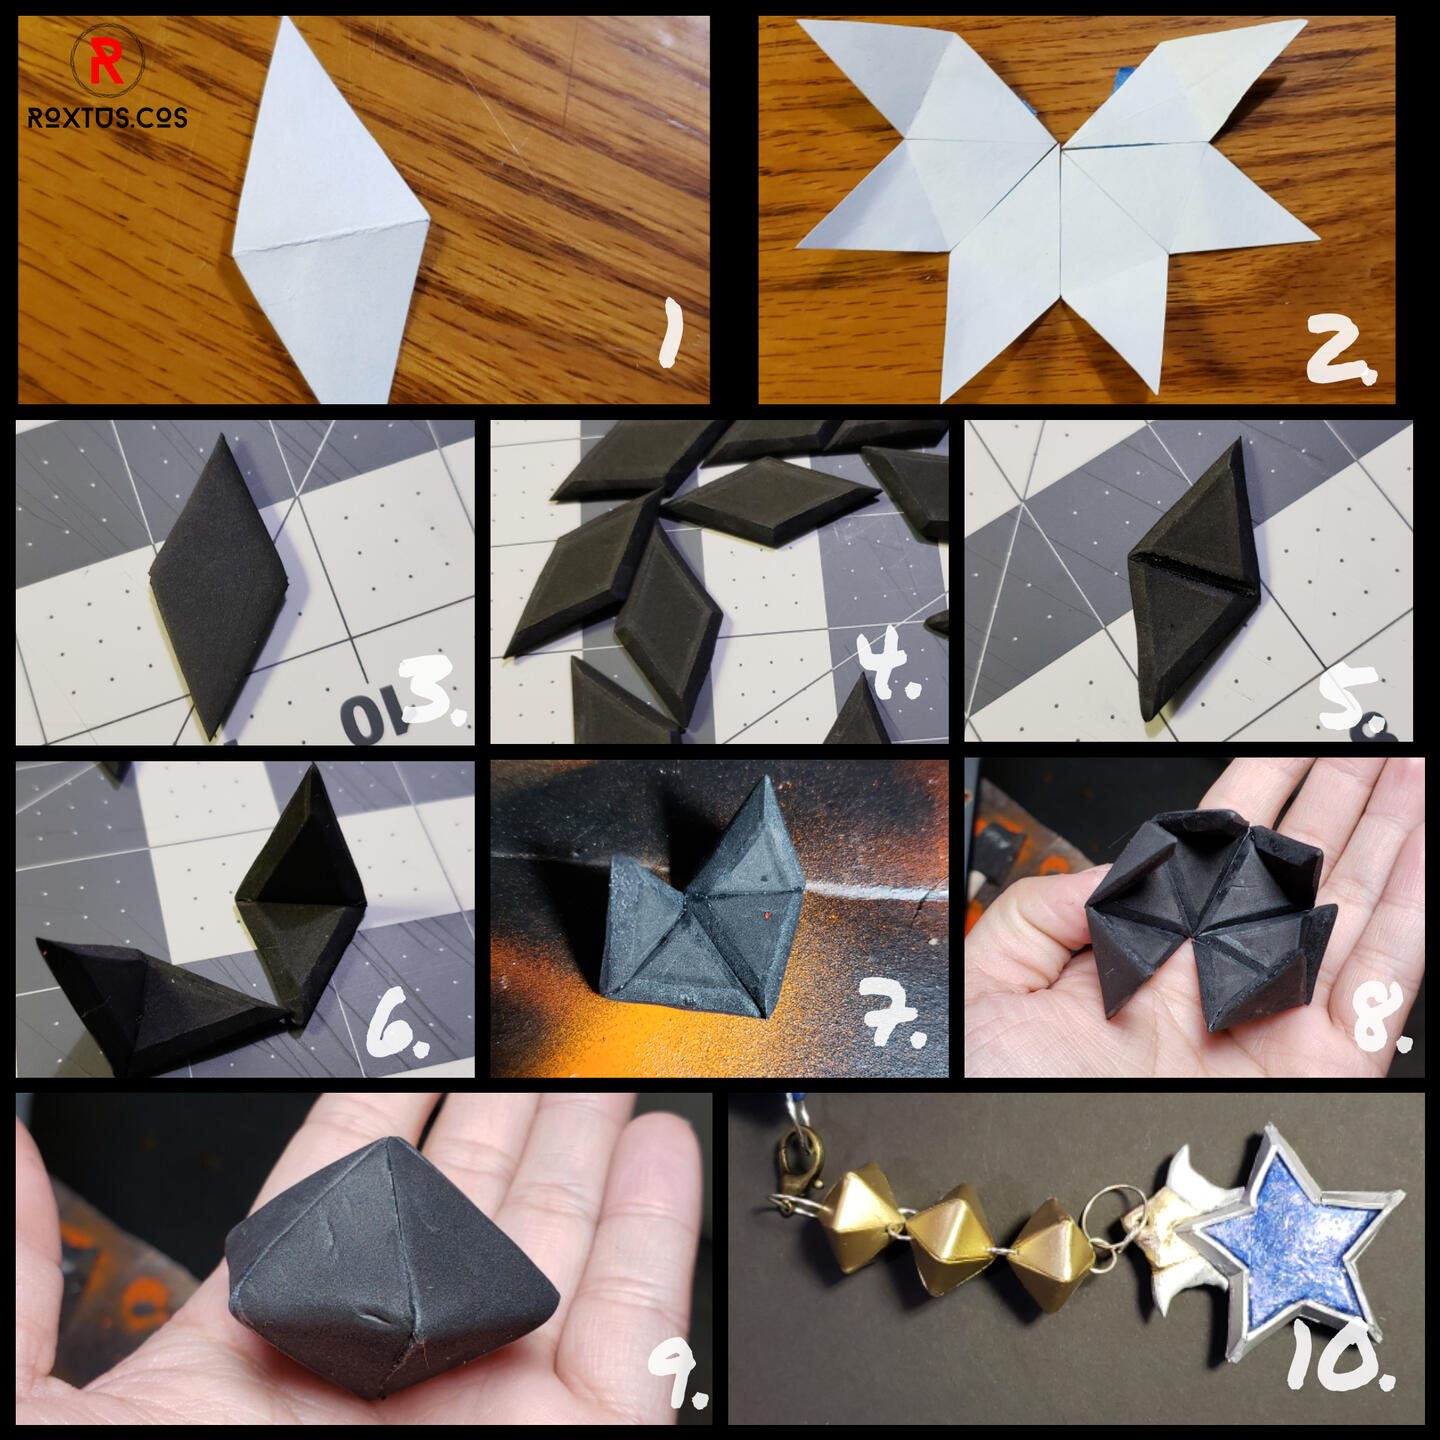
1.-2. As always. Make a paper pattern first. The shape I was making had 6 sides, so I made 5 more paper shapes and taped them together to make sure everything looked right.
3. Next, cut out all your little diamonds. I had to cut out 18.
4. Then, bevel the edges with scissors. (Hold your scissors at an angle on the edge and cut)
5. After beveling is done. Get your wood burning tool and ditch a straight line in the middle of all your diamonds.(make sure you don't go all the way through the foam)
6. Right after ditching one of your diamonds, fold it along the ditch you just made while it's still hot so that it keeps its shape.
7. After ditching and folding is all done, put contact cement on all the beveled edges, let dry for about 5 minutes then stick the edges together flat on the table. (Don't stick the beveled edges together just yet, or you wont be able to fit all your diamonds in.
8. Once you have them all stuck together flat, then you can connect the other side of the diamonds and then seal it closed.
9. Here is what it should look like after all the sides have been stuck together.
10. Lastly, you can paint the shape anyway that you like, I primed with plasti dip first, then painted with gold metallic spray paint.
Materials -4mm EVA-90 from @cosplaycrafts
-wood burning tool
-x acto knife
-paper, pencil and tape
-plasti dip
-spray paint of your choice
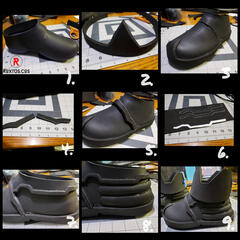
Foam Shoes Tutorial
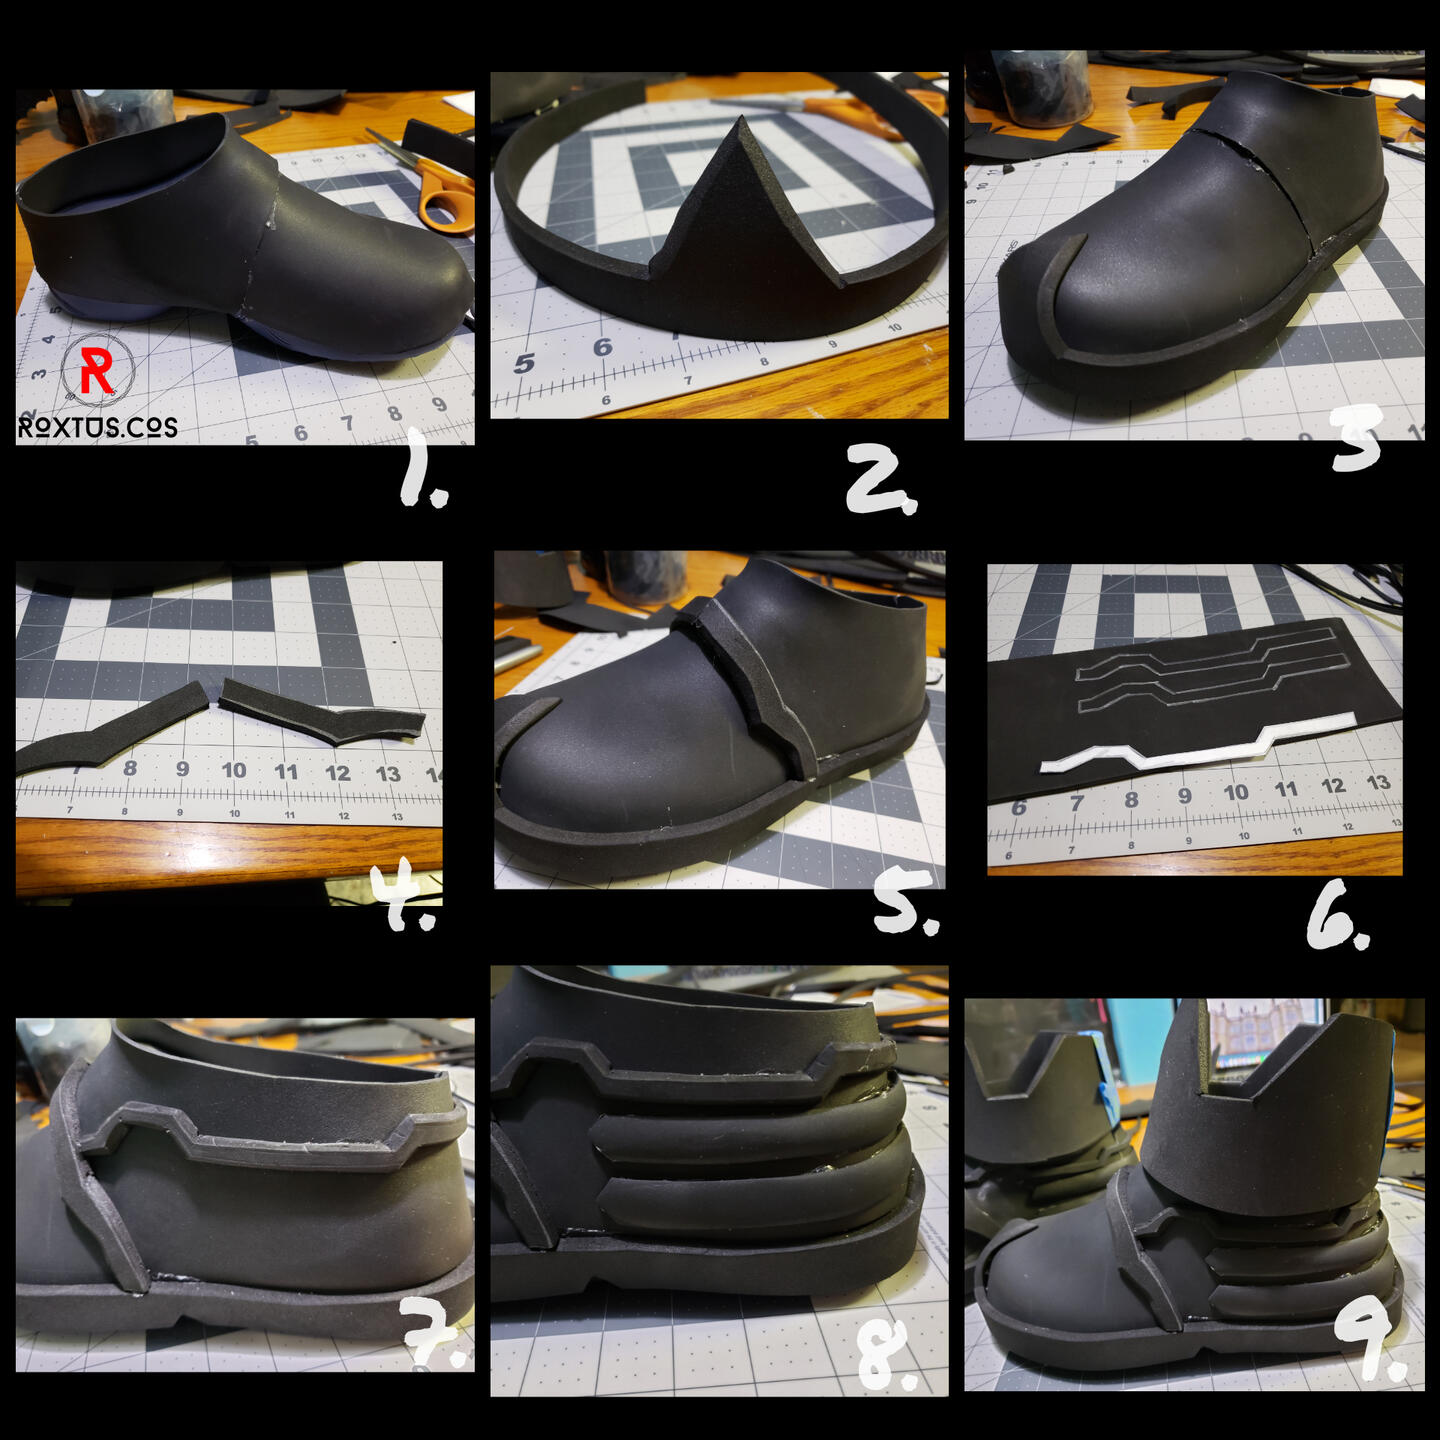
1. So I actually did not take too many pictures of the process I used to get the foam on the shoe. (You can see the process in the video tutorial I will post on my patreon later this month) First you will need a shoe for your base I used a foam croc style shoe. But basically you use a heat gun to heat up your foam and shape it over the front part of the shoe. As you can see in the picture, there are 2 parts of foam covering the shoe. I used a second piece of foam to cover the back of the shoe and put the seam in the back of the shoe. Your heat gun is your best friend in this step!
2. Now we are going to make the bottom rim of the shoe out of 6mm eva foam. I made sure a I had a long enough strip of foam to more than cover the outline of the shoe. It has a triangle shape on the nose of the shoe, so I cut that out of the foam towards the middle and beveled it with scissors.
3. Then you just have to glue the rim of the shoe down and heat gun the triangle to shape it over the nose of the shoe and then glue it down.
4. I made little paper patterns of the middle design of the shoe. Once you do that you can cut these pieces out of 6mm foam. You will need 2 of them mirrored. Bevel the bottom edges of the shape. (The edge with the point )
5. Next, remember that seam in the middle of the shoe that you got when you glued the two shapes together? With the pieces you just made you are going to glue them right over the seam and make sure that they meet in the middle and hit the edge of the rim of your shoe.
6. Next the details on the side of the shoe. Again I made a paper pattern for this shape them traced it onto 4mm foam. Cut that out and bevel both sides of the foam. Make sure you bevel the right sides of the foam.(be sure that you have 2 mirrored pieces)
7. After your pieces are cut out, you can glue them onto your shoe as seen in this step.
8. Next, there are these long raised pointed parts of the shoe. First, I cut out strips of 2mm eva foam that are longer than what I need. Now, for a trick using the heat gun. If you heat up 2mm foam long enough then the edges of that foam will start to curl up In on itself. This is how i managed to get a slight raise in the foam without having to do much work. Now all you have to do is cut the ends to be a point and glue them on the shoe. If the strip you have is too long, just measure and cut to size.
9. So the last step in this process is to cut out the shape for the crown looking shoe cuff thing that he has. Once again I made a paper pattern for this first and then transferred it to 6mm eva foam. After you have your pattern cut out, glue the edges together.
Note- the crown piece in the picture above is not actually attached yet to the shoe, this is going to be attached later with contact cement after I paint the shoe.
And you're done!😁
Materials
• Base Shoe
• 2mm, 4mm and 6mm eva foam • Heat Gun
• Hot Glue
• Paper for patterning
• Scissors and x -acto knife
DIY Rounded Dowel Shape
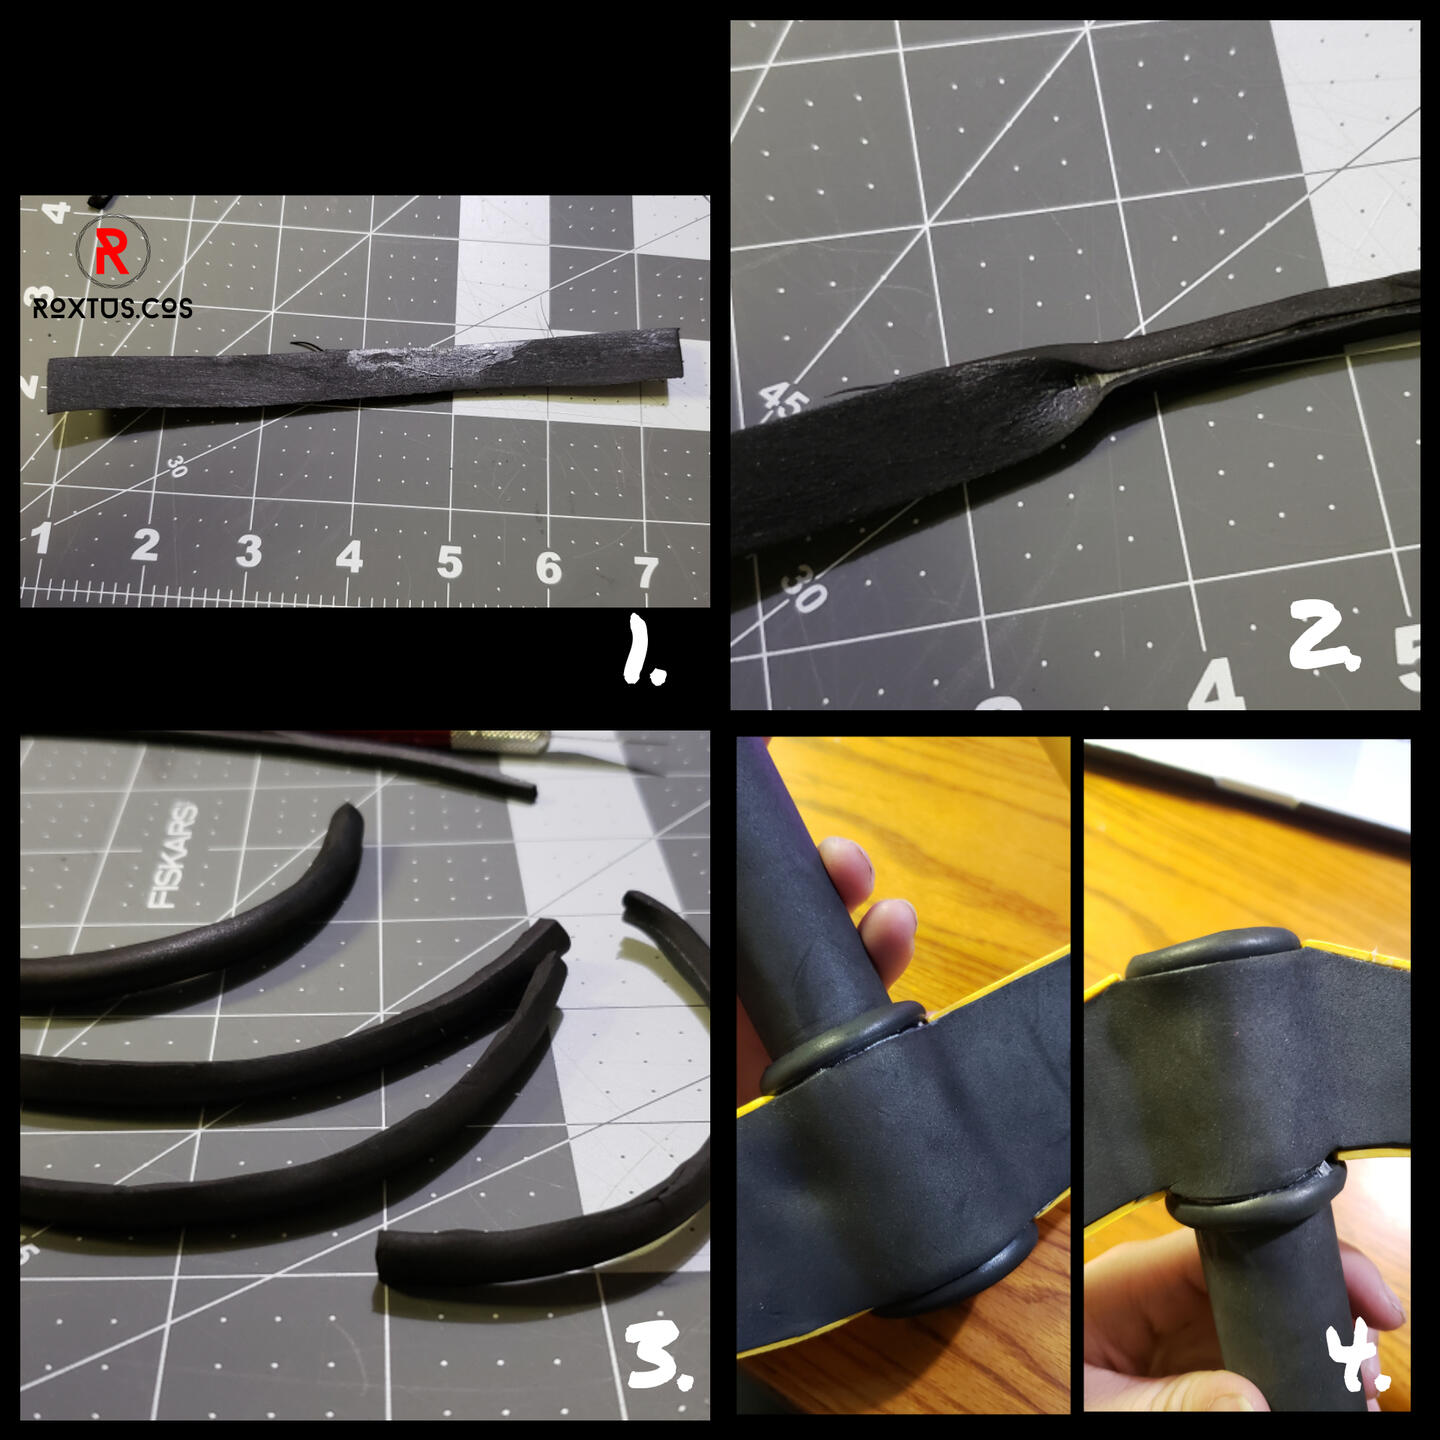
Make rounded strips out of flat EVA foam
Materials
-heat gun
-contact cement
-4mm EVA foam from @cosplaycrafts (you could try this out on thicker foam too!)
-scissors
1.First you are going to want to cut a strip of foam about ½ inch wide and you can make this however long you want. Then cover it with a thin layer of contact cement and let it dry.
2. Once dry, take your heat gun and heat up the strip so that it is flexible and warm (don’t heat it up so much that it starts to burn your foam). Once warm and bendy press the 2 edges toward the middle on the contact cement side and they should stick together. Keep in mind that you don’t want to press them super flat to each other. You are going to want to try and just attach the edges and squish the bottom and top together to create a rounded shape on the outside.
3. Once you’ve done this with all your pieces, they should all have a slight rounded bend to them.
4. Lastly you can attach them to whatever you need. In the picture I used them for my Kingdom Key Keyblade for the rounded raised edges on the handle. I found this a simple alternative if you don’t have round dowels available!
If you try it out tag me so I can see it!
Detachable Keyblade
Here it is! How to make your Keyblade detachable for travel or storage! This is how I did my Kingdom Key! This can be tweaked to fit your needs and could also work for props besides Keyblades.
Detachable Keyblade Tutorial!
-Keyblade handle already cut out and ready to go made from 3 layers of foam core board.
-3/4 inch PVC pipe
-3/4 inch PVC pipe coupler (straight coupler)
-I used thick aluminum wire (you could use a different kind of wire as long as it is decently thick and strong)
-super glue
-drill
-saw
1. First, get the PVC pipes you are using and measure them all to the size you want and cut off the excess. Do the same for the coupler. (keep in mind that the coupler has a raised line on the inside to keep the pipe from going in too far. Keep this in mind when cutting your coupler to the right size.) I had one long piece for the main blade part and a shorter piece for the handle. I had my big paper pattern scale design and measured and marked how long I wanted my pieces. Make sure that the PVC pipe length overlaps the actual foam handle part (that is how we are going to attach the handle to the PVC pipe)
2. After pieces are all cut use your drill to drill holes starting on the top and going all the way through to the other side of the PVC pipe (use whichever size bit that you need to drill a hole big enough for the wire to fit through, but not too big that the wire is too loose) These holes will be at one end of the PVC pipe(this will be the bottom of the handle) and the other on the coupler itself. (I drilled mine right where the inner seam of the PVC coupler is, so that the wire doesn’t interfere with the pipe getting removed and put on.)
3.-4. Then you are going to attach one side of your PVC pipe to one side of your coupler, like in picture 4. After you do that then you can insert a 4-5inch piece of wire into each slot. The wire should be straight across in the center of the pipe (pic 3) and coming out of each end in pic 4.
5. Next, you are going to take the Keyblade handle (I made mine out of 3 layers of foam core board) and cut out a section at the top and the bottom for your PVC pipe to fit into.
6. -7. Now, take your PVC pipe with the wire sticking out of both sides and insert the wire into the middle layer of the foam core board. Do the same thing to the other side of the Keyblade and wires. After you have initially inserted your wire, they will still be loose and able to be removed. To fix this put some superglue on the wire and re-insert into the handle. You can also put some super glue where the PVC and foam core board meet.
8.-9. Finally, you can take the longer blade piece of PVC and insert it into the top PVC coupler, and you have a detachable Keyblade!
If you have any questions, don’t be afraid to DM me on Instagram. This tutorial could be a little confusing so if you have questions, ask them! If you guys would like me to do maybe, an Instagram live tutorial on this, just let me know and I can probably set something up! Hope this tutorial helps!